How to Use Mounting Tape for Attaching Car Trims
Reattaching trims is a relatively straightforward task, but it’s one you’ll want to be able to get right for your customers. This relies on having the perfect tape to hand to ensure that the attachment stays put and doesn’t budge under any conditions, come rain or shine.
Whether the trim has fallen off completely or a customer asks you to secure a loose trim, as a repair professional, you should be able to reattach it so that they leave your shop with everything as secure as possible. While this can be done using a few different methods, this is by far the quickest, easiest, and most effective choice.
Throughout this guide, we’ll provide you with our top tips for attaching car trims successfully, along with the tape you need to get the job done.
Best Products for Reattaching Car Trim: What to Use
A wide variety of tape types are available to use in the automotive industry. Whether they’re acrylic or foam-based, wide or thin, and have water-resistant or solvent-resistant properties, it can sometimes be complicated to decide which is right for each task. Luckily, there are certain properties that are best suited to specific applications – you just need to know what to look for.
Asking yourself which tape is best to use for reattaching car trim? We recommend using a double-sided mounting tape, since these are usually high-tack and are designed to easily attach two materials together.
Below, we’ll give you an in-depth look at our top double-sided tape recommended for this application, along with some of its main properties.
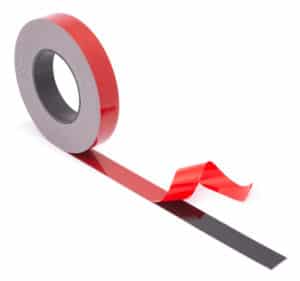
Grey Double-Sided Acrylic Tape

Our premium double-sided acrylic tape offers the perfect solution for attaching a wide range of substrates to the interior and exterior of vehicles. The reinforced closed-cell foam construction of the tape gives it high-tack properties, meaning it remains tough and durable throughout any weather conditions thrown at it. Therefore, this tape is ideal and trustworthy for attaching car trims and does an excellent job at ensuring your fixing will remain in place for an extended period without any further issues.
Our versatile premium tape also comes in a variety of sizes, from 6mm to 25mm, making it useful for mounting trims and mouldings of all shapes and sizes.
Want to gain a better understanding of double-sided mounting tape? Read our helpful guide here.
How to Attach Car Trim with Mounting Tape
Whether you’re reattaching car door trim or bumper trim, the process will be very similar. Here we’ll guide you through our top tips for attaching car trim using our heavy-duty mounting tape.
What you’ll need:
- JTAPE double-sided acrylic tape
- Clean cloths
- A knife/razor
- Exterior car cleaning solution/alcohol-based cleaner
1. Clean the area
Taking a clean cloth and your preferred cleaning solution, you should start by cleaning the area of the car where the trim should be. This area should be completely free from any dust, dirt, debris or remaining adhesive before moving on to the next steps.
For more stubborn adhesive removal, it might be necessary to rub an alcohol-based cleaning solution on the area.
2. Cut your two-sided mounting tape to size

Next, take a razor or knife and cut smaller strips of tape to fit lengthways onto the back of the trim. The more pieces of tape you add, the higher the level of adhesion you’ll achieve. So, it’s best to add as many strips of tape as you can fit across the width of the trim.
3. Remove the protective release liner
Once you’ve applied all your tape pieces and are happy with the placement, you can remove the protective release liner from each strip of tape. When doing this, try not to touch the adhesive since this can reduce its effectiveness when you place it onto the vehicle.
4. Attach the trim to the vehicle
Lining the trim and attaching it as it was originally done is crucial for achieving the best possible finish on your fixing and having a happy customer at the end of your job. Be sure to spend some time getting the placement right and readjusting as needed. The more time you spend getting this right, the better it will be.
When attaching the trim, you should also press down to ensure the trim is securely mounted to whichever area of the car you’re applying it to. Allow this to sit for a moment while the tape bonds the two surfaces together – this can take around 24 hours to achieve the resilient bond required for this type of fixing.
We trust that this guide will come in handy for repair professionals at all stages of their careers looking to attach car trim using mounting tape. Whether you’re fixing a door trim or bumper moulding, having these reattached properly can transform the entire look of the car.
At JTAPE, we’re dedicated to helping repair shop professionals achieve their desired finish each time. To learn more about us and our range of professional tape products, check out our homepage.


